The checklist is meant to be an essential tool for cleaning and maintenance tasks management. iGMS checklists will help you to streamline your housekeeping routine and make sure your rentals are clean from top to bottom and ready for your guests.
You can add a checklist for a cleaning assignment and for a non-cleaning task. Let’s check out the basic operations you can complete when working with both types of checklists.
How to create a cleaning checklist
You can go through our video tutorial and learn more by reading the instructions below.
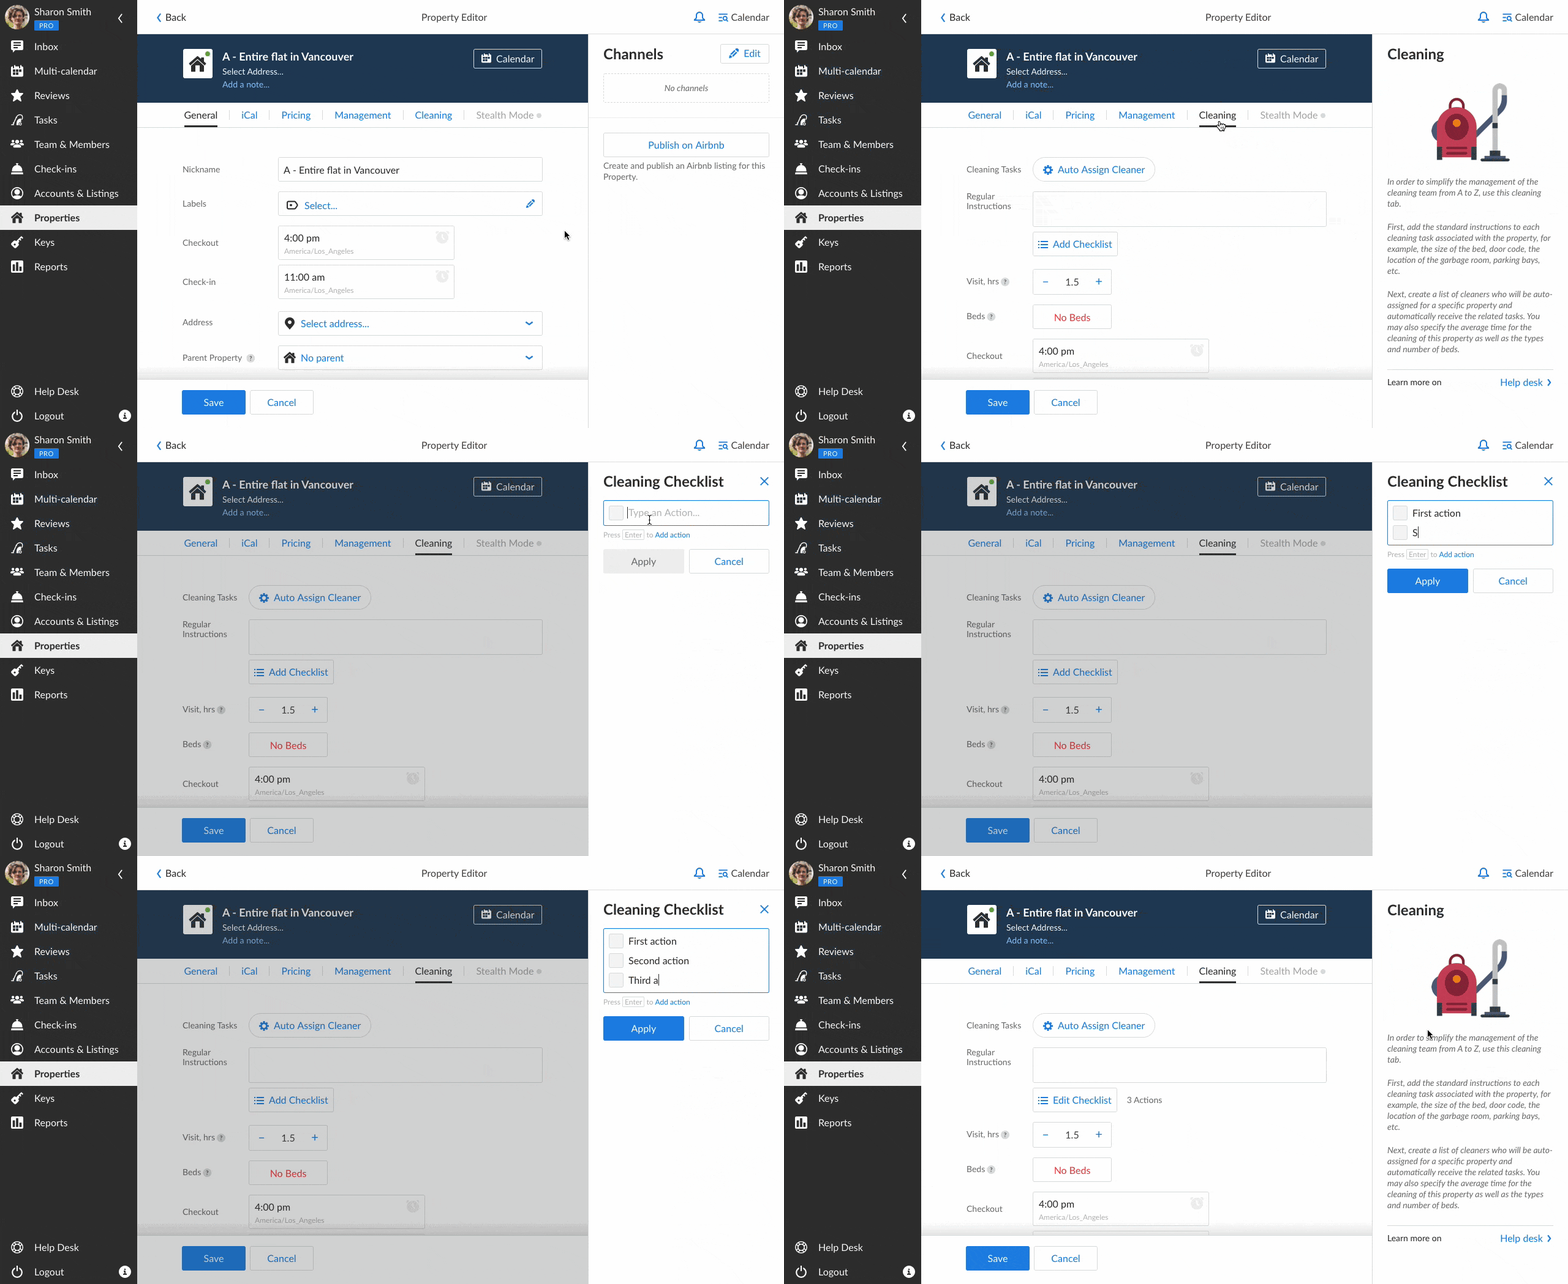
- Go to the Properties section and choose a property for which you’d like to add a checklist with cleaning instructions.
- Open the Property Editor and switch to the Cleaning Tab.
- Click the Add Checklist button, type in all the actions that need to be performed and click Apply and Save.
The checklist will be automatically assigned to all the upcoming cleaning tasks for this specific property.
Is it possible to apply one checklist to different properties?
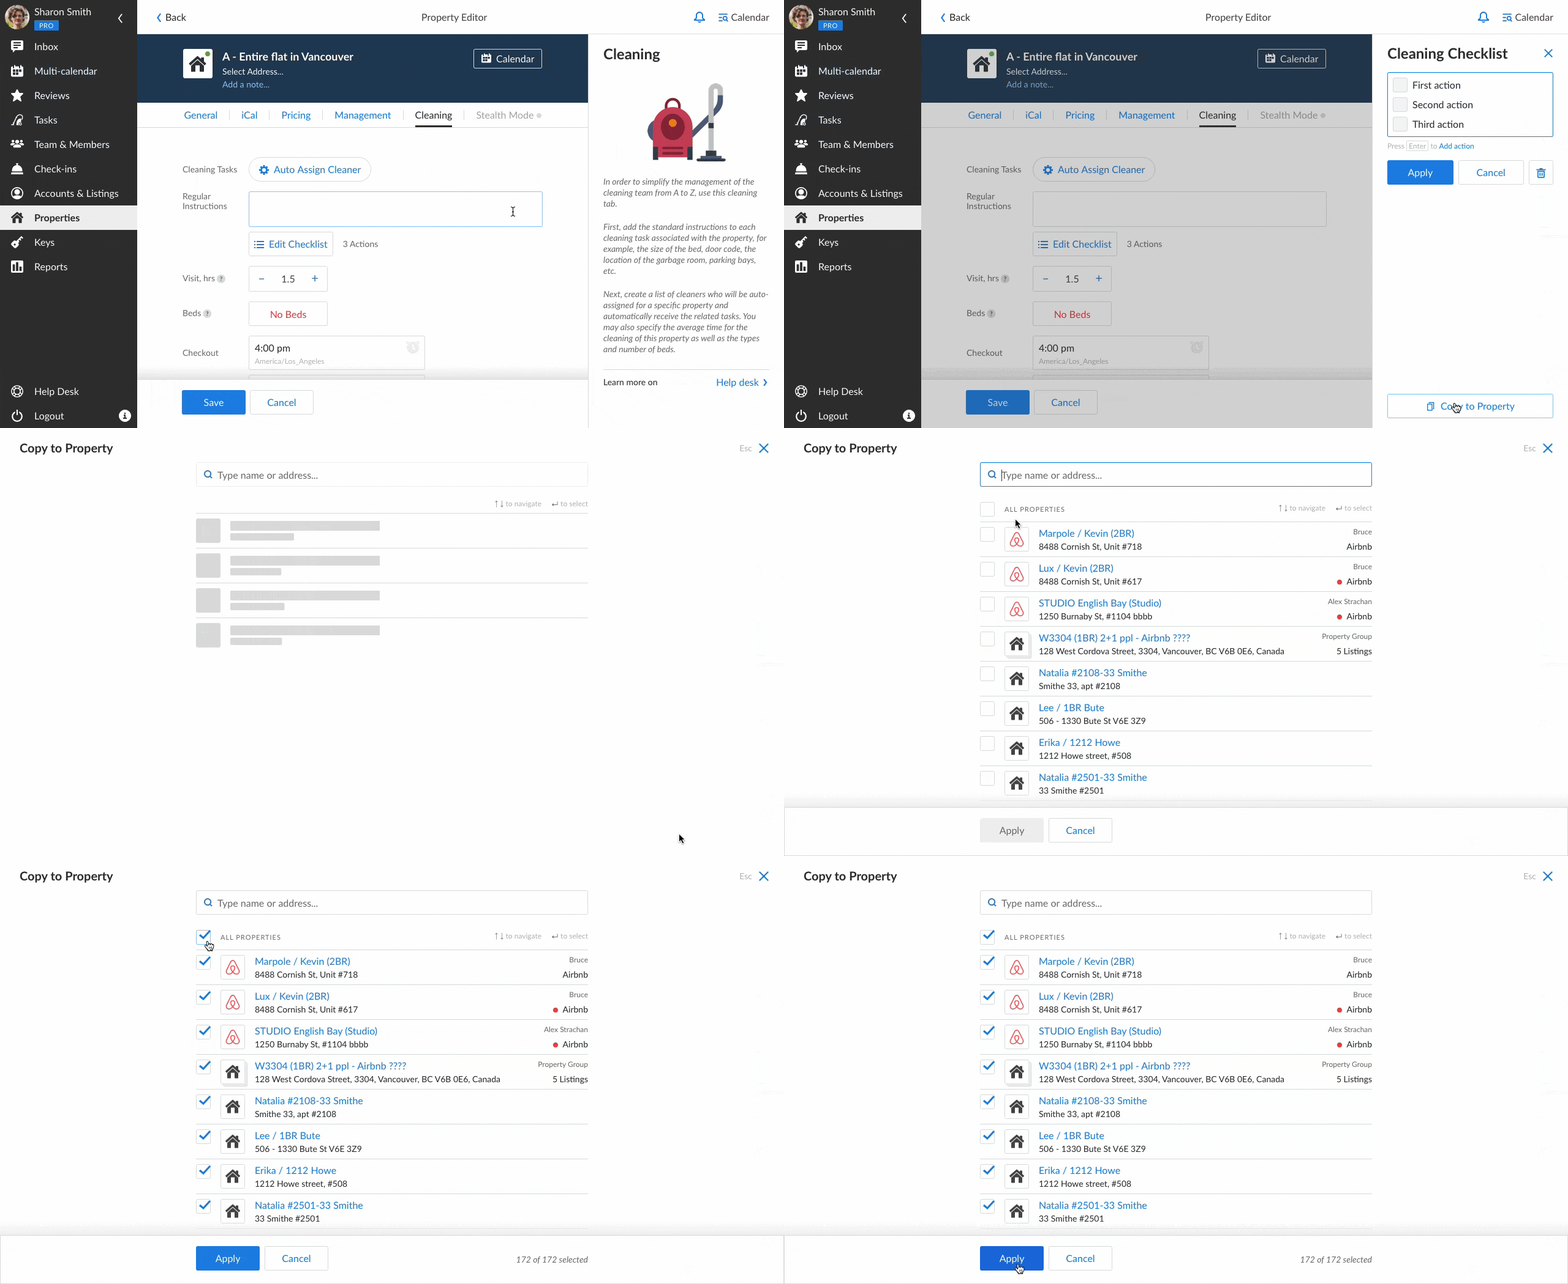
Sure! If you have the general cleaning instructions for all of your properties, you can copy the checklist to other units:
- In the Cleaning Tab, click Edit Checklist.
- Click Copy to Property, and choose all the properties
- Click Apply.
How to edit a cleaning checklist
If you would like to update your checklist, this also can be done in minutes.
- Go to the Properties section and open the specific unit.
- In the Property Editor, open the Cleaning Tab.
- Click the Edit Checklist button. To add a checklist item, press Enter. To remove it, press Backspace.
- After you’ve edited the checklist, click Apply and Save.
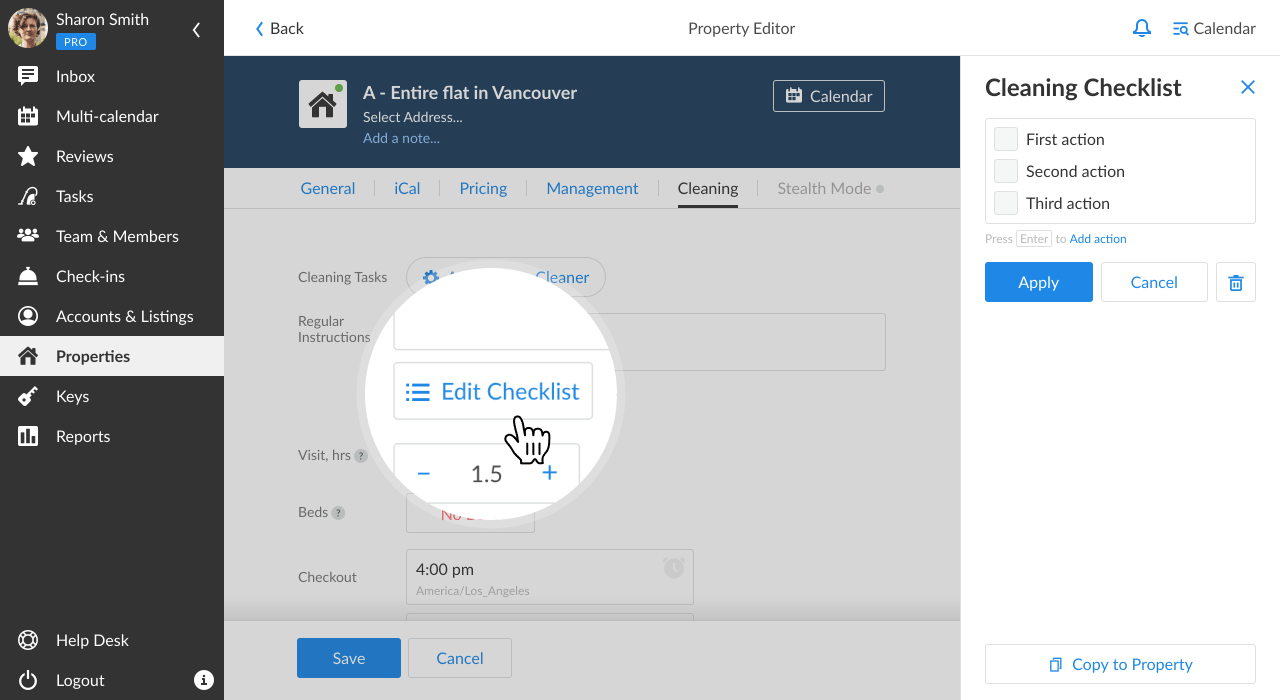
Note that all the changes will be automatically applied to all the upcoming cleaning visits with the checklist.
How to create a checklist for a task
Non-cleaning tasks can also have a checklist, but the navigation will differ. If you want to specify your task with a checklist, you first need to create a task itself:
- Open the Tasks section, tick a New Task option (under the New Cleaning button) and select the property.
- Click the Add Checklist button and add all the necessary items. Click Apply and Add.
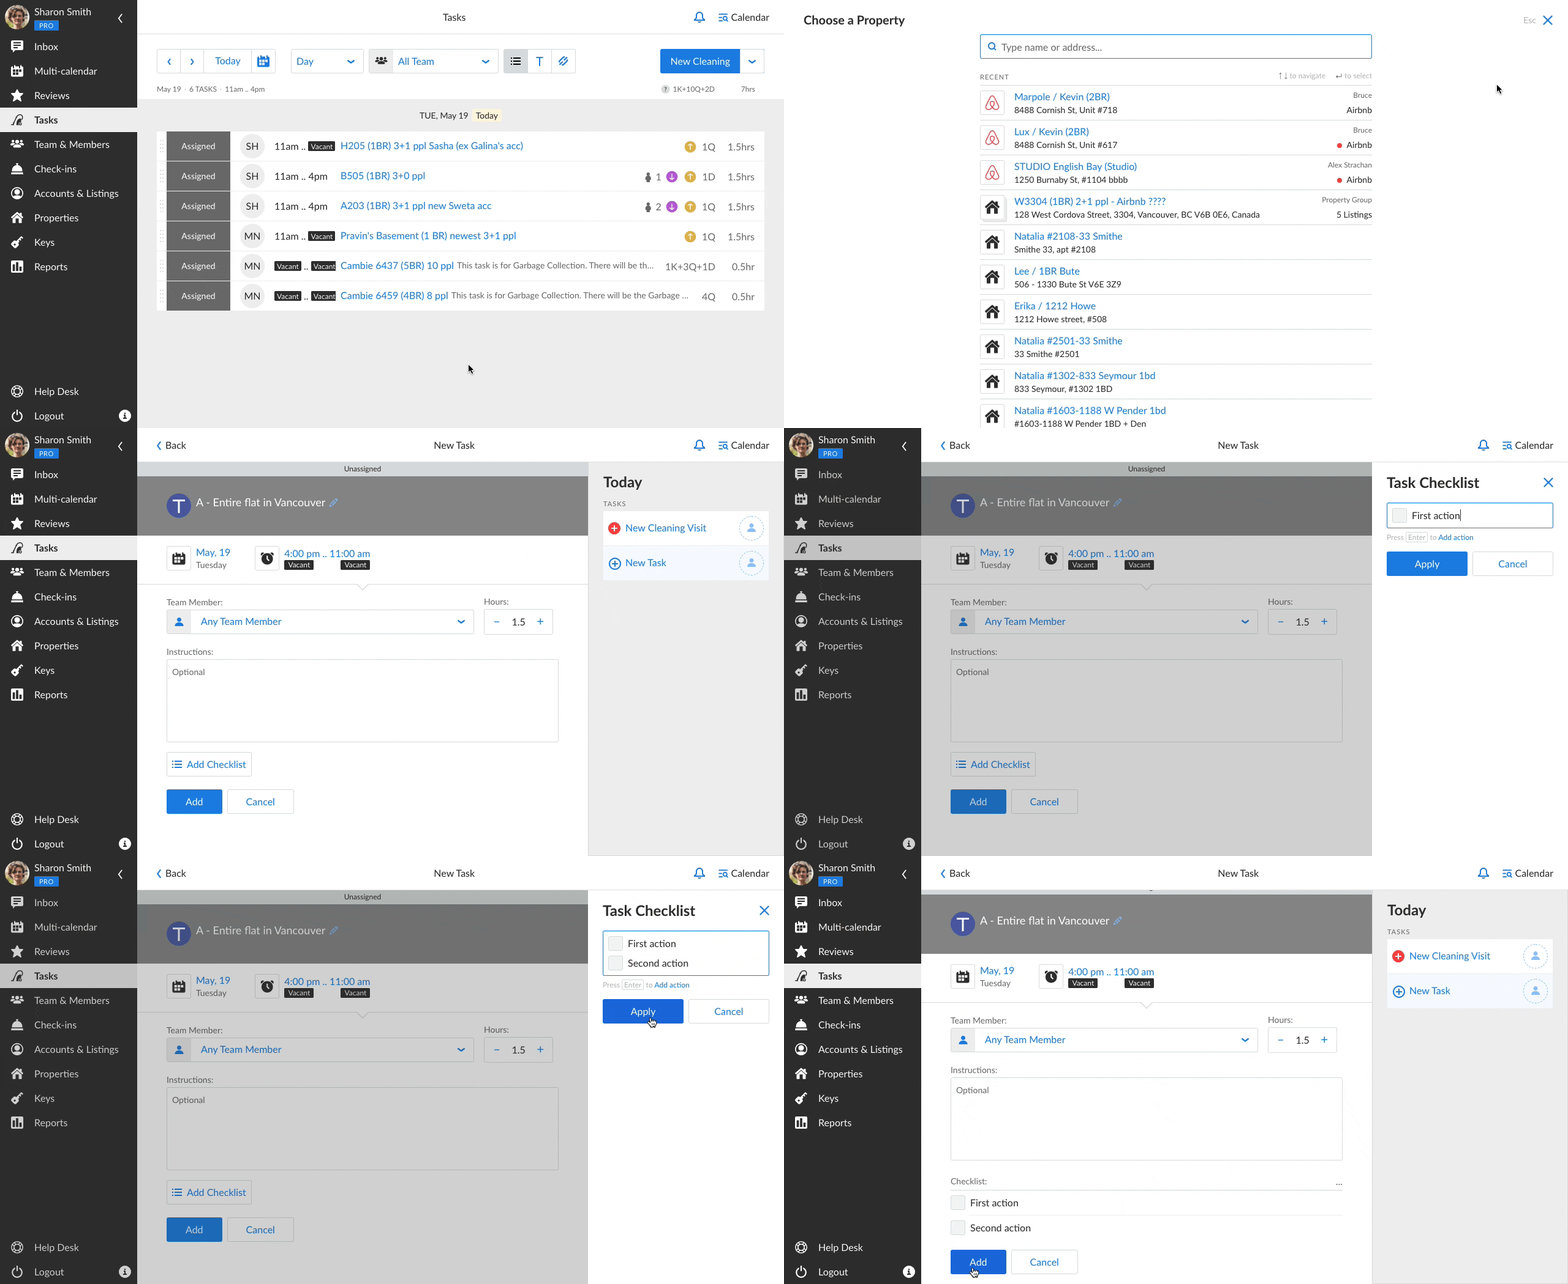
This type of checklist is also editable:
- Click the Edit Checklist button. To add a checklist item, press Enter. To remove it, press Backspace.
- After you’ve edited the checklist, click Apply and Save.
Who can access a checklist?
iGMS users with Head of Cleaners, Administrator, and Manager roles can create, edit and copy checklists.
Cleaners can view and use checklists while doing their assignments. The detailed guide is included in the Instructions for Cleaners on iGMS.
How to delete a checklist
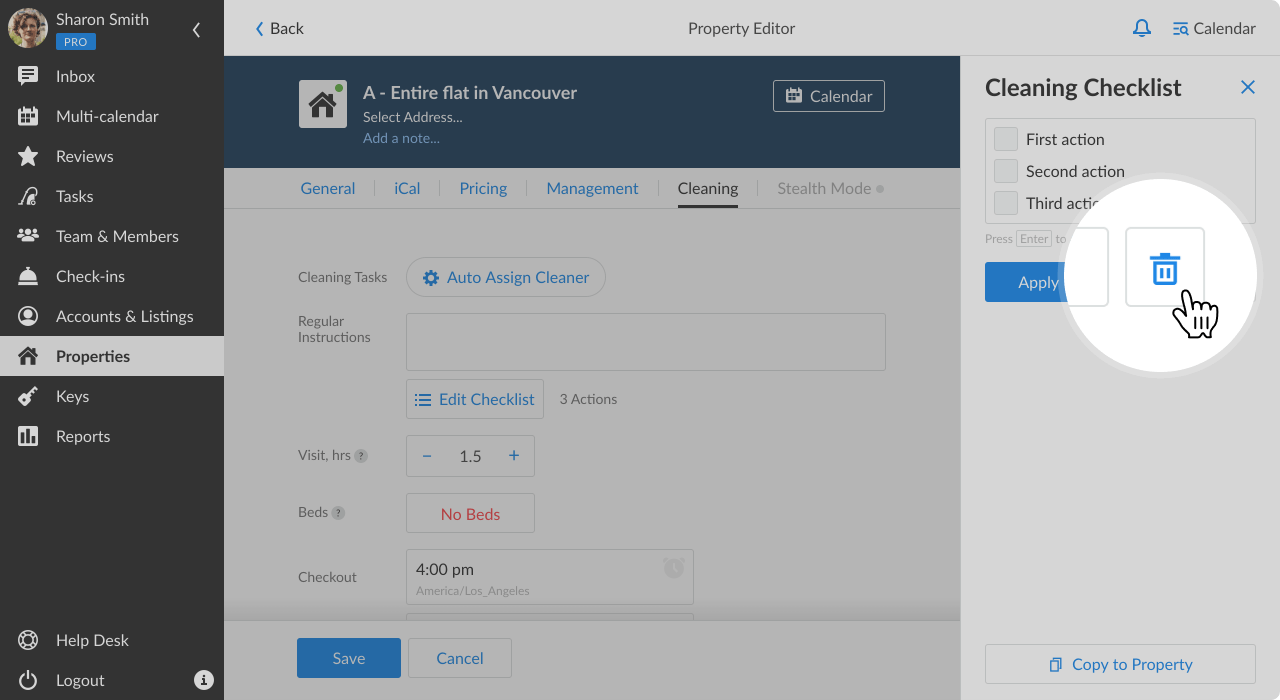
To delete a cleaning checklist:
- Go to the Property Editor and switch to the Cleaning Tab.
- Click Edit Checklist and click on the Recycle Bin button.
- Click Yes to confirm.
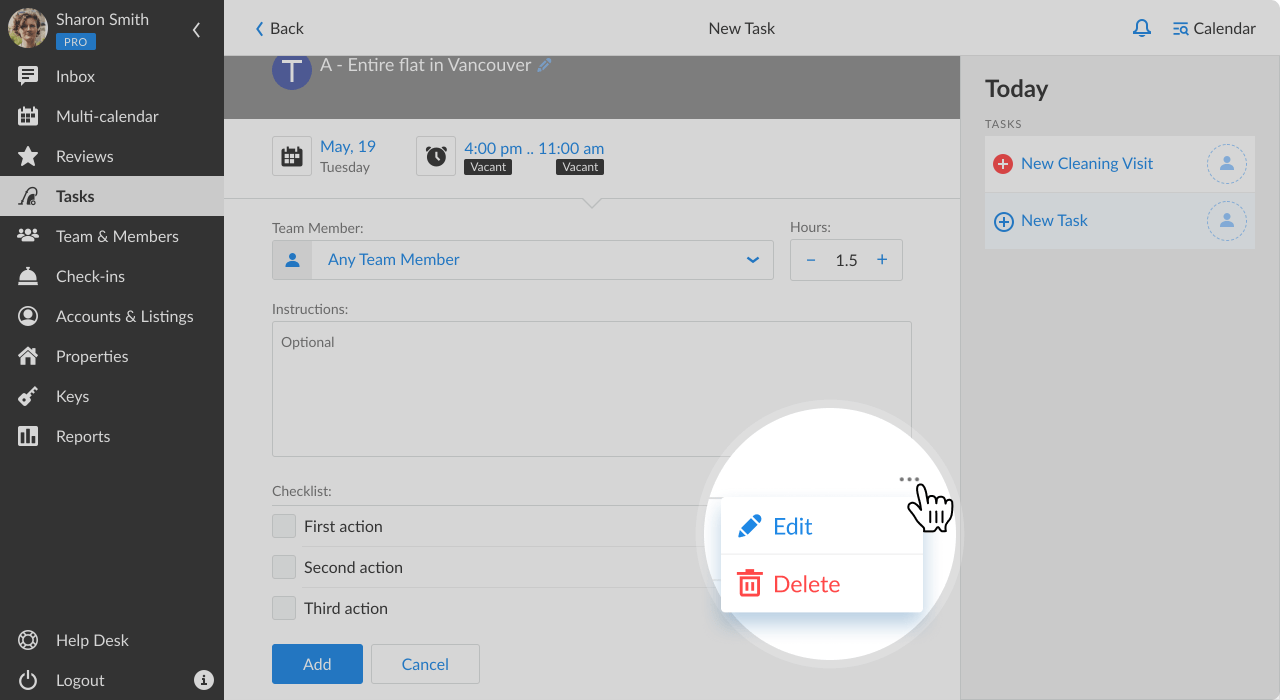
To delete a task-related checklist:
- Go to the Tasks section and choose the task you need to delete a checklist for.
- Click More and select Delete.
We hope you find the checklist functionality useful and that it will bring more structure to your cleaning routine. If you have any questions about checklists or tasks management on iGMS, feel free to contact our Customer Experience Team via email.

