Once you have set up your templates, it’s time to automate them. In just a few clicks you can set up triggers that will help you to automate up to 70% of your daily communication.
Watch the video in Spanish here.
How to set up the automation for templates?
You can edit templates and set up triggers in the Inbox section or the Property Editor.
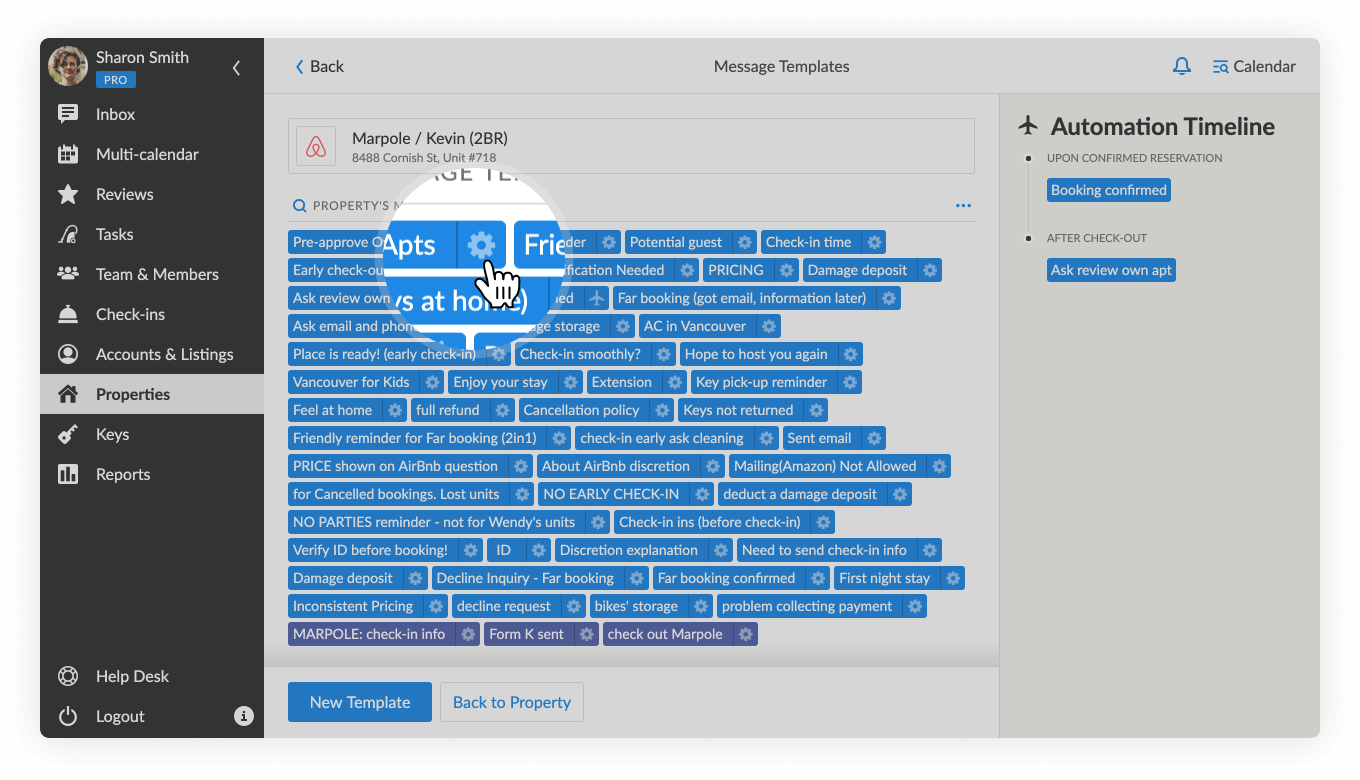
- Choose a template you want to automate and click on the Cog icon next to the name to open the Template Editor.
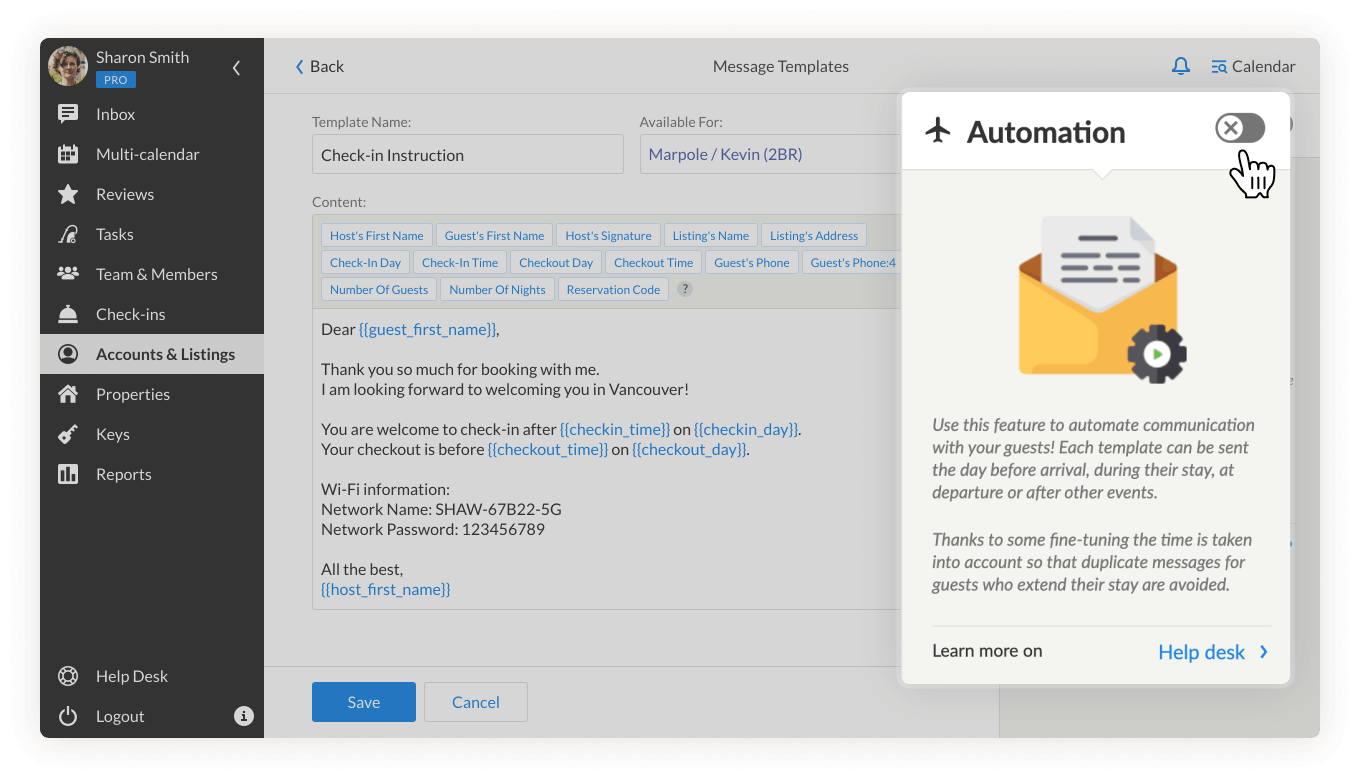
- Enable the Automation toggle to the right to automate your template and set the trigger.
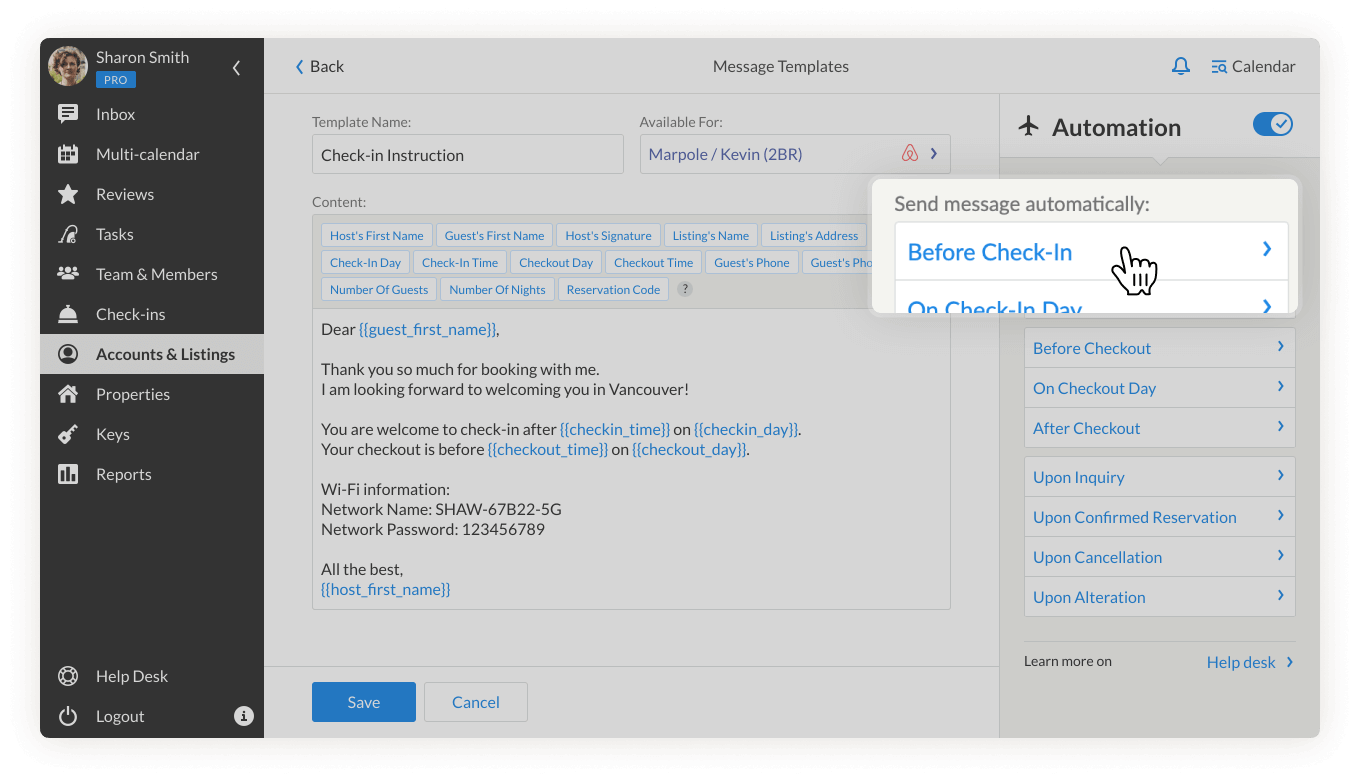
- Choose the trigger, settings and click Save.
Can you give me an example of auto-reply?
Let’s look at the example of setting up a trigger for a check-in instruction.
- Once the automation trigger is enabled, choose the trigger Before Check-in.
- Set up how many days in advance the template should be sent.
In this example, we’ve decided to choose 1 day and also apply the last-minute booking (closer than 1 day) option so the guests who book late can receive the instructions almost immediately.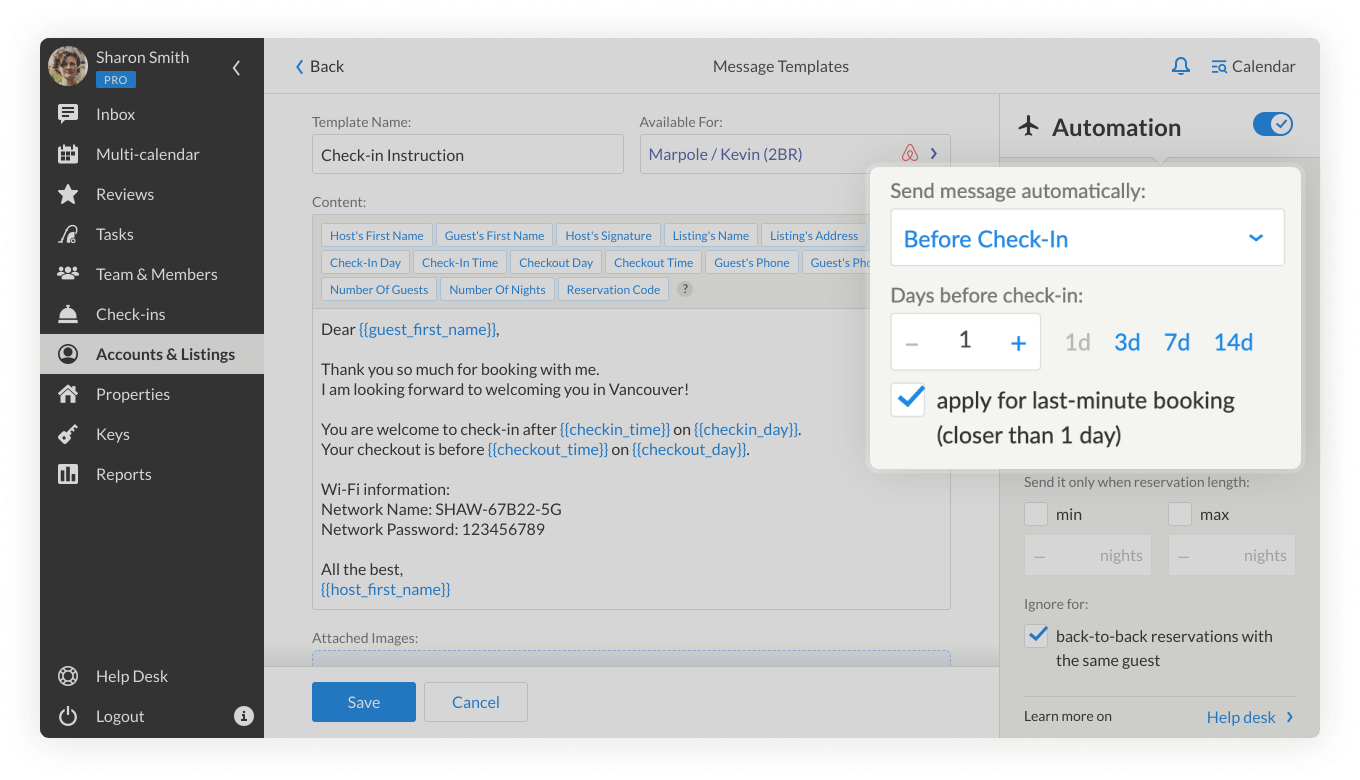
- Set the time to enable the trigger. It gets determined by the property’s time zone.
- You can customize whether to send a template to the guest based on the length of the stay by setting the minimum and maximum number of days.
Please note, you can prevent the message from being sent to guests who make a new reservation on the same day they have a checkout by marking the box “ignore for back-to-back reservations”.
This way you can, for instance, prevent the check-in instructions or welcome message from being sent several times to the same guest.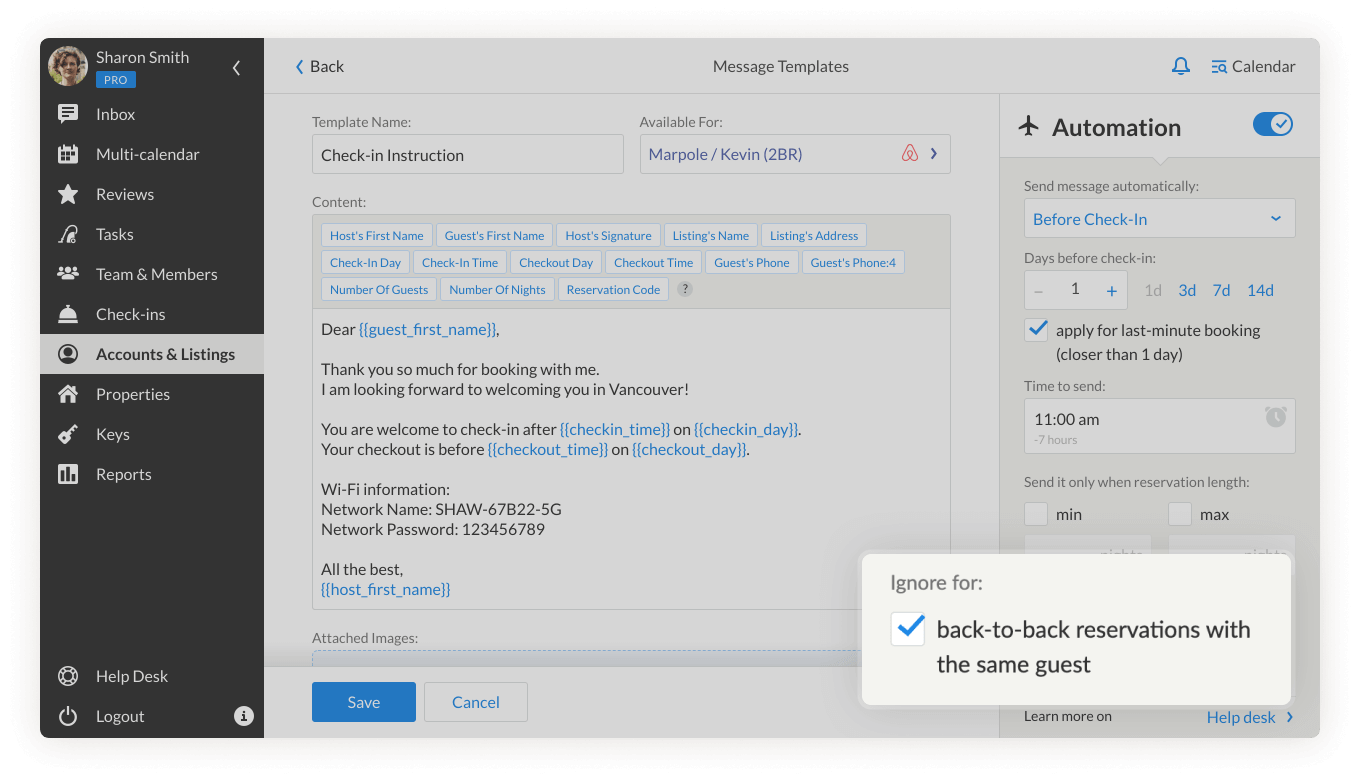
- You can attach images to the template. The system supports images up to 25 MB, and the following formats: JPG, PNG, and GIF.
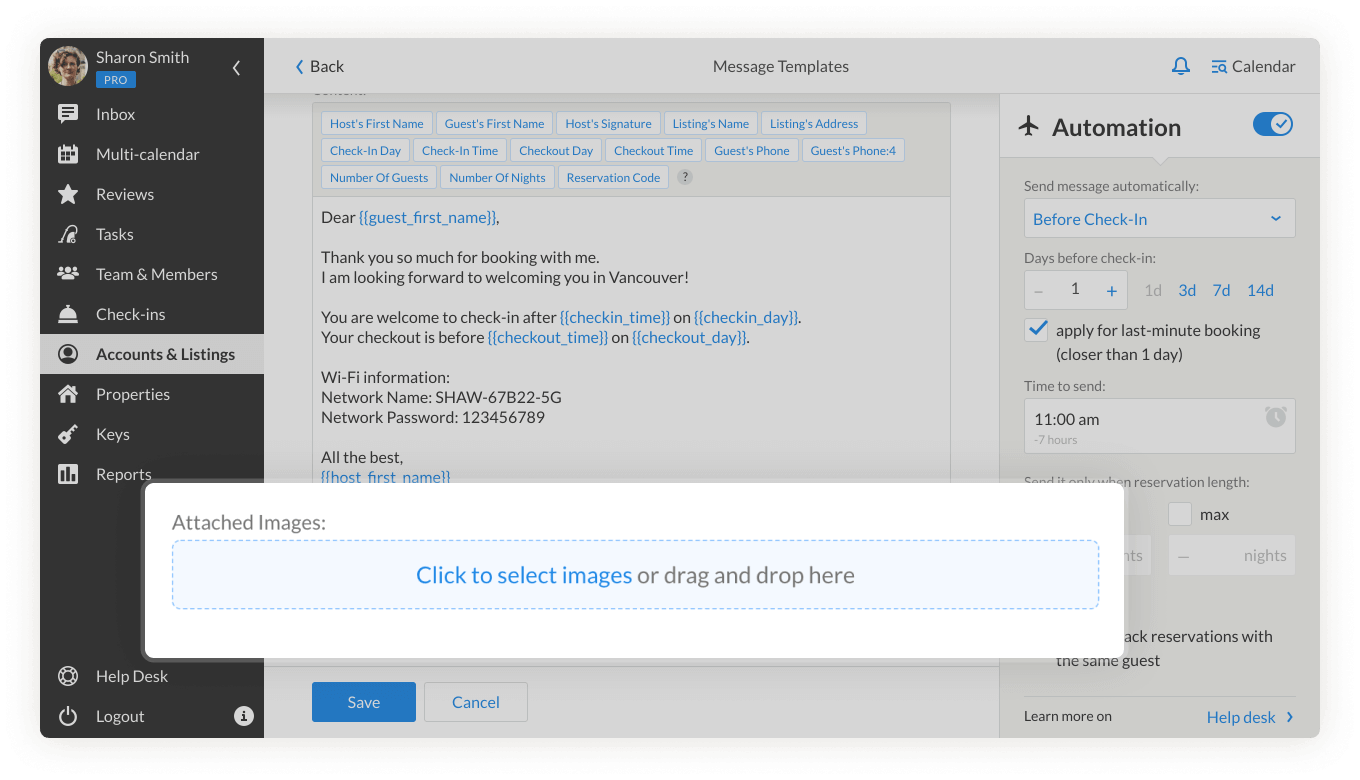 If you need to send a PDF file, we recommend adding a link to the document on Google Drive and pasting this link in the message’s body.
 - Click Save to finish.
The check-in instructions are ready to go!
Want to learn more about triggers and settings? We have a detailed article on how to automate your messages for different purposes.
How to disable automation?
Via the Inbox
Simply click on the Airplane icon (all automated messages have it next to the title) and disable the trigger OFF.
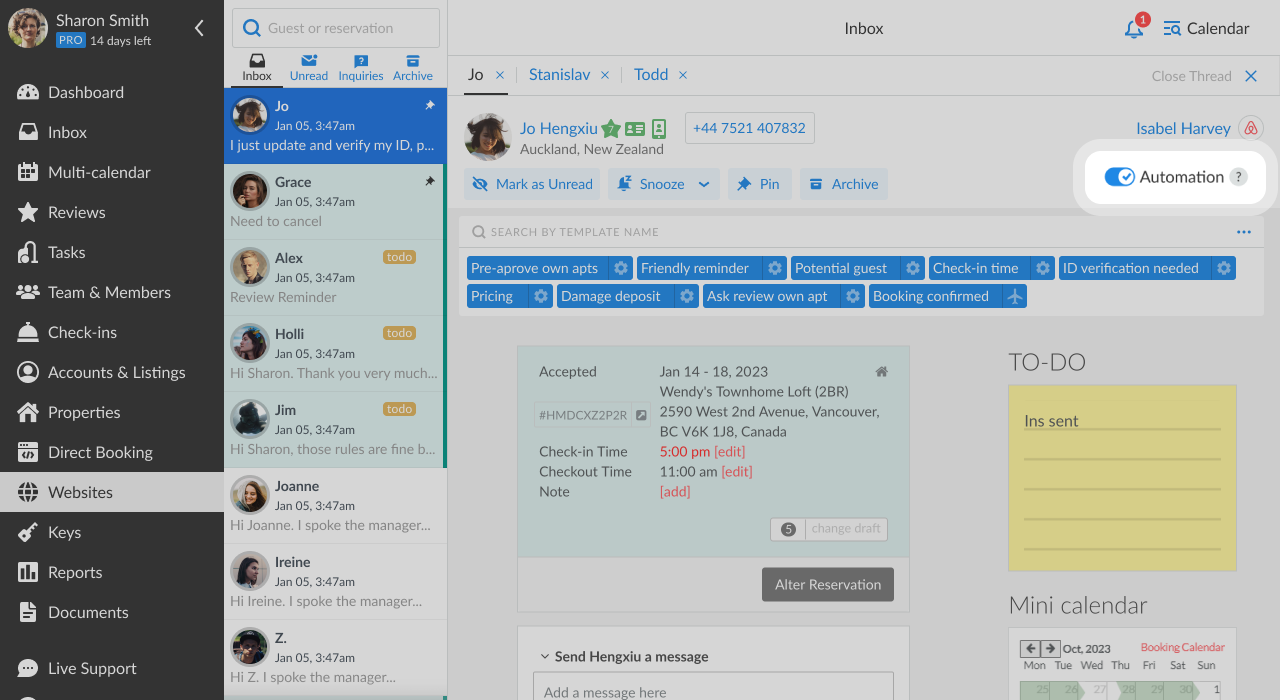
You can also disable automation for specific guests. You will find a DISABLE AUTOMATION TOGGLE in the right side:
Via the Property Editor
To disable all automation and inbox messages for specific properties, go to the Property Editor.
On the General Tab, you will find Feature with the button Settings. You will be able to see if Inbox and Reviews are enabled for this property.
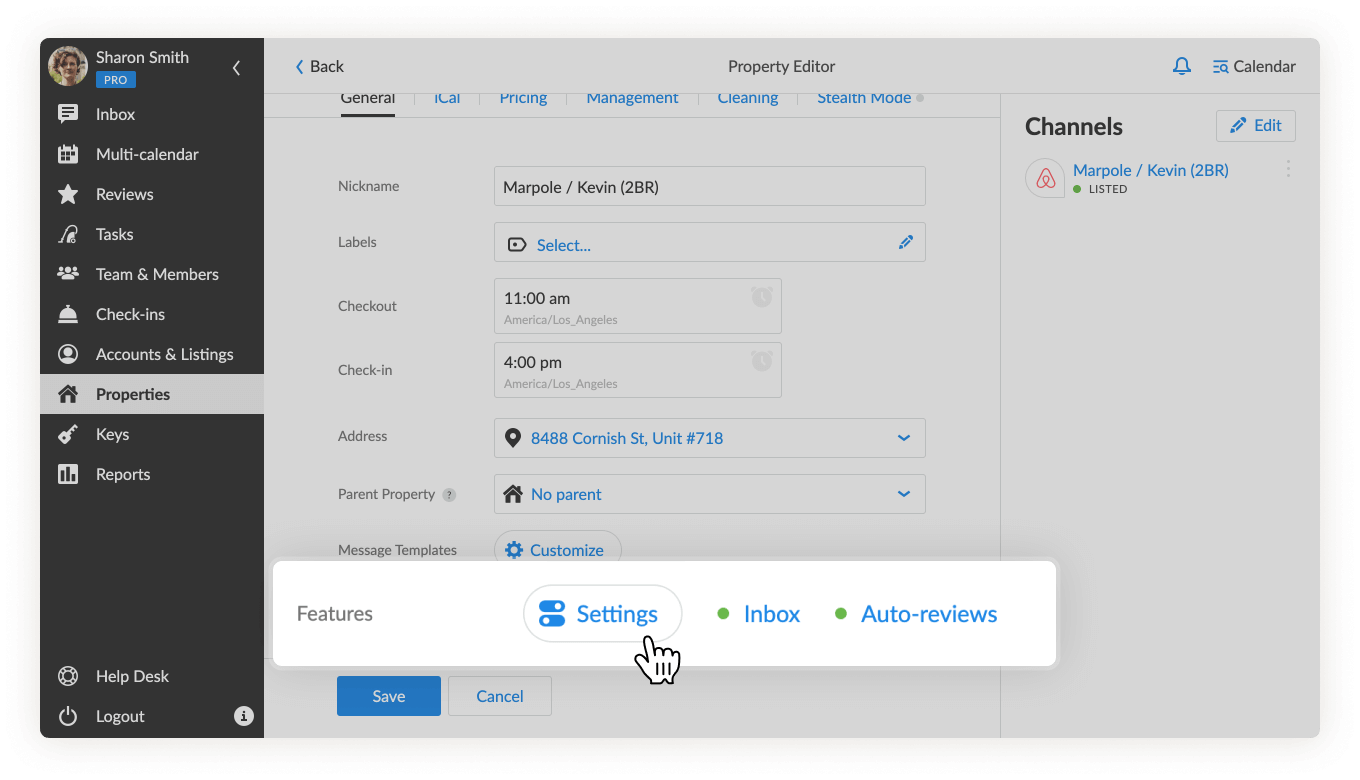
Click on the Settings to open the menu to the right.
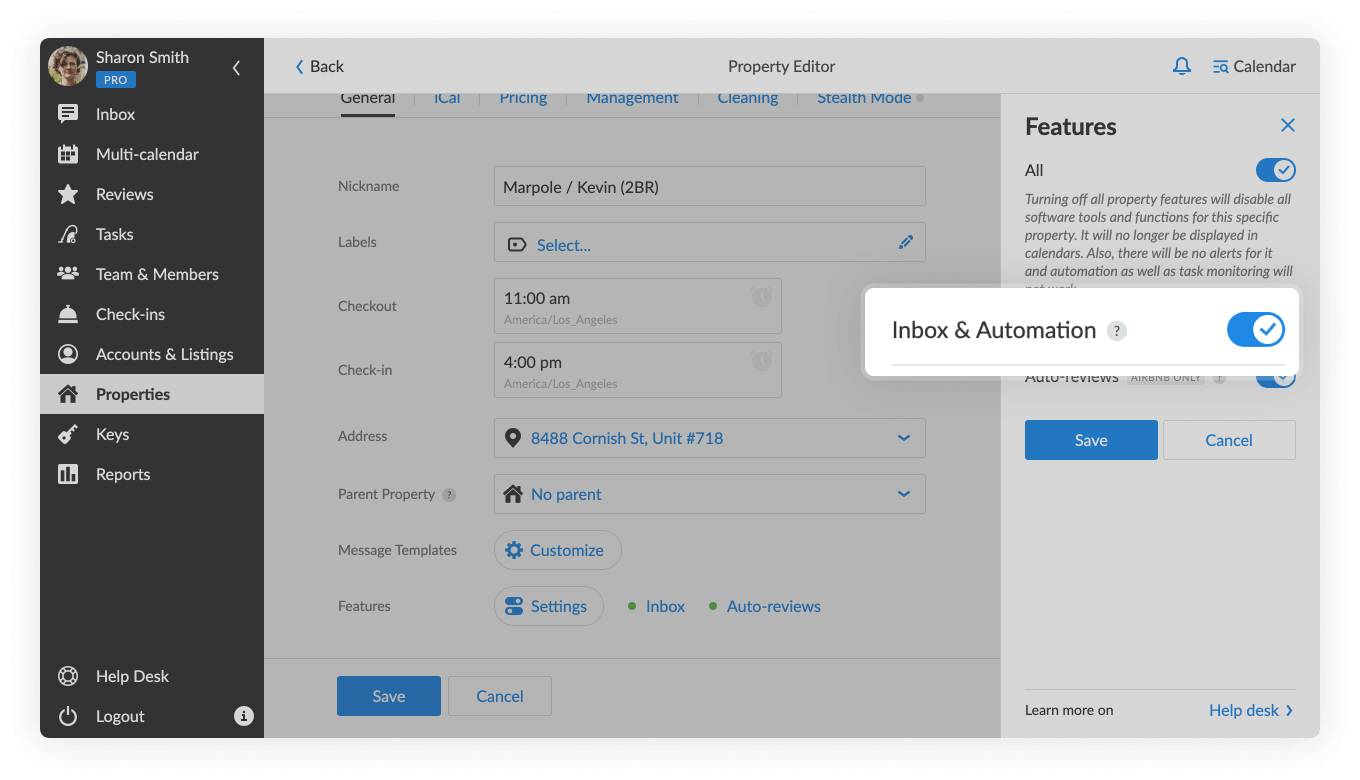
Here you can disable a toggle for automation and inbox messages for this particular property only. Once disabled, you will see that the Inbox indicator will fade away. It means that the inbox for this property is off.
Save changes to disable the automation.
If you have questions about triggers or need help, reach out to our Customer Experience via support@igms.com.

